The Complete Guide to Professional Milk Foaming: Latte Temperature, Texture, and Timing

Introduction: To create a delicate, velvety latte with latte art, milk foam quality is key. This article provides a detailed analysis of the core techniques for milk frothing, including optimal steam temperature, foam thickness control, and frothing duration, to help coffee enthusiasts and professionals master professional-level milk foam production. By adjusting the steam wand angle and mastering the frothing rhythm, even beginners can easily produce high-quality milk foam as smooth as a mirror.
To make a perfect hot latte, the quality of the milk foam directly affects the overall mouthfeel. Unlike simply heating milk, injecting air into milk via a steam wand to create fine foam enriches the coffee's texture, making it more velvety. However, if the foam is too rough, thick, or even separates from the milk, it will ruin the drinking experience. Ideal milk foam should be silky smooth, with a uniform sheen on the surface, and when swirled, it should exhibit a creamy, flowing texture.

To achieve such high-quality foam, one must first understand how the steam wand works. Steam is injected into the milk through a high-temperature steam orifice. In a partially submerged state, it both heats the milk and incorporates air to form foam. You will hear a distinct "hissing" sound, which indicates air entering the milk. Once enough foam has formed, fully submerge the steam orifice into the milk to only heat, avoiding over-aeration that makes the foam too thick.

Proper angle control is crucial when frothing milk. Tilt the milk pitcher about 15-20 degrees so the spout forms an appropriate angle with the steam wand, creating a stable vortex in the milk. Usually, placing the steam wand at the 3 o'clock or 9 o'clock position on the surface yields the best results, maximizing steam energy and creating a uniform rotation. Observe the milk surface; the ideal vortex should be steady and continuous, without violent turbulence.

The frothing process can be divided into three stages: initial aeration, foam formation, and foam refinement. Start with the steam orifice partially submerged, and you will hear a clear air intake sound—this is the initial stage of foam formation. As the foam volume increases, gradually adjust the steam orifice to the fully submerged position, focusing on heating and refining the foam. Throughout the process, pay special attention to controlling steam pressure; too much steam will make the foam coarse, while too little will not create enough foam.

The final quality of the milk foam depends on three key parameters: temperature, thickness, and fineness. Professionals recommend keeping the milk temperature between 55-65°C, a range that preserves coffee flavor and maintains foam stability. You can use a thermometer for precise measurement, but experienced baristas often judge by feel—when the pitcher is warm but not too hot to hold, that's the ideal temperature. For foam thickness, latte art typically requires a 3-5mm microfoam layer, while cappuccino needs a thicker foam base.

After frothing, the final step is foam refinement. Even if basic foam has formed, some larger bubbles may remain. At this point, slightly expose the steam orifice above the milk surface and use gentle steam to break up these large bubbles. Observe the foam surface; high-quality foam should have a uniform reflective sheen, and when swirling the pitcher, you should feel good fluidity and viscosity. If large bubbles persist, gently tap the pitcher on the counter 1-2 times to help them burst, but avoid overdoing it to prevent the foam from separating.

Temperature control is a key element in milk frothing. Beginners are advised to use a thermometer for practice, keeping the final milk temperature stable within 55-65°C. This range ensures the coffee's aromatic compounds are fully released without denaturing milk proteins due to excessive heat, which would affect foam stability. If no thermometer is available, you can judge by the following method: when the pitcher is too hot to hold for long (around 60°C), stop heating. Note that the optimal milk frothing temperature should not exceed 70°C; otherwise, it not only affects taste but may also pose a safety risk.
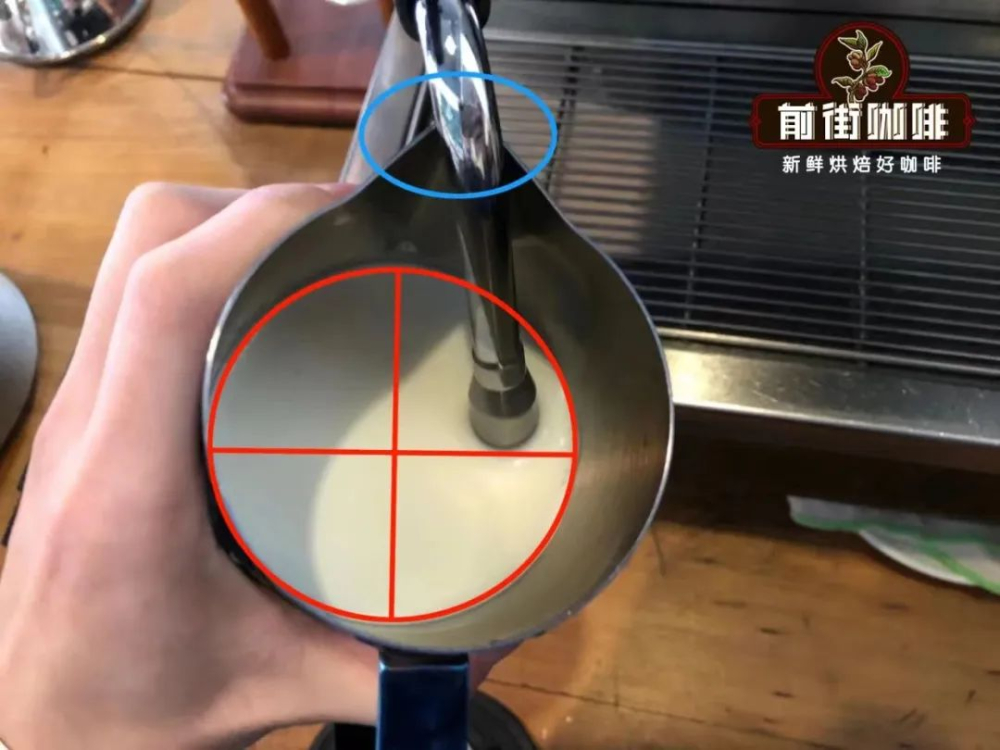
For beginners, mastering steam wand techniques requires gradual practice. First, ensure you use fresh refrigerated milk (ideally around 4°C), which provides a longer working window and better foam quality. Pour milk into the pitcher to about 1/3 capacity, leaving enough room for expansion. Before turning on the steam, release any condensation from the wand to avoid affecting steam purity. Keep the pitcher stable during operation and control the vortex size by adjusting the tilt angle; a stable vortex is the foundation for uniform foam.
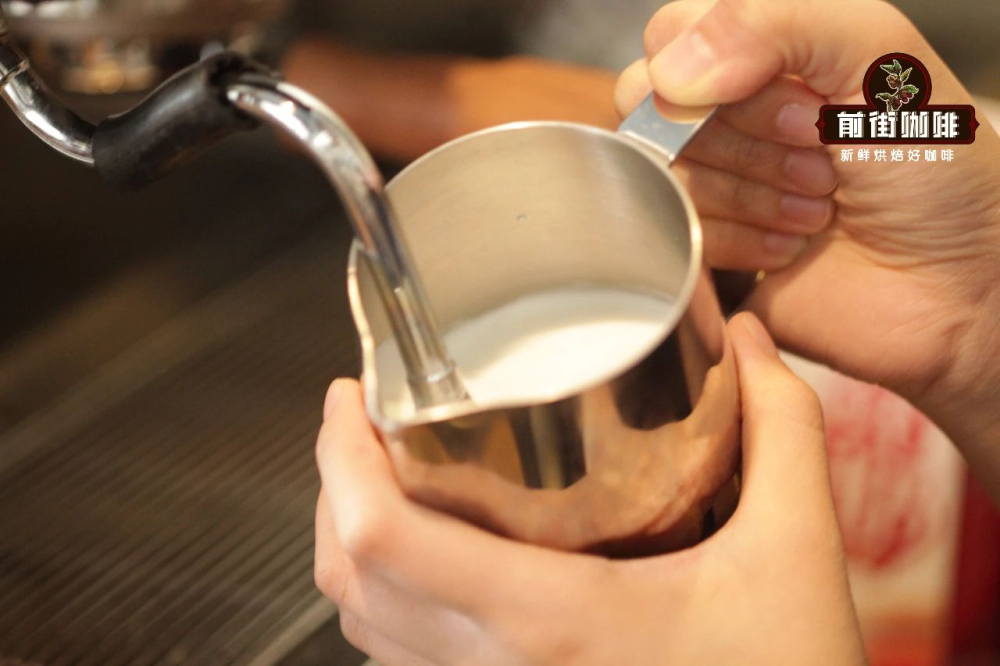
Solutions to common problems: If the foam is too coarse, try reducing steam pressure or moving the pitcher more quickly; if the foam is too thin, increase steam volume and extend frothing time; if the foam separates from the milk, it's usually due to overheating or over-frothing. Remember, the core characteristics of high-quality foam are "fine, uniform, and fluid"—when swirling the pitcher, it should feel as smooth and resistant as swirling cream.
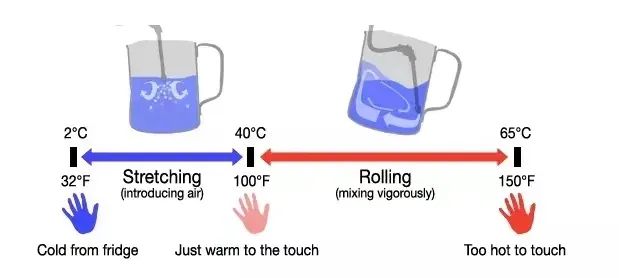
Summary of the standard procedure for high-quality milk foam: 1) Prepare refrigerated milk to 1/3 of the pitcher capacity; 2) Release condensation from the steam wand; 3) Adjust to the proper angle and start frothing, first partially submerging to form initial foam; 4) Once enough foam has formed, fully submerge to refine; 5) Control temperature to decide when to stop (55-65°C); 6) Finally, check foam quality and make necessary adjustments. By repeatedly practicing these techniques, even coffee novices can gradually master professional-level milk frothing skills.