Home Pour-Over Black Coffee Guide: From Bean Selection to Brewing Parameters
Introduction: You can easily make professional-level pour-over black coffee at home! This article systematically explains the differences among the three main brewing methods, focusing on breaking down the core techniques and equipment choices for pour-over coffee. From the flavor characteristics of Arabica beans to precise control of water temperature and coffee-to-water ratio, it provides detailed steps you can put into practice immediately, along with professional parameter references to help you avoid common brewing pitfalls and unlock coffee's layered flavors.
To make a pure cup of black coffee, there are mainly three classic methods: filter brewing, siphon, and electric. Among them, filter brewing (commonly known as pour-over) has simple tools—only a dripper, filter paper, and a server are needed—but it places higher demands on technique and suits coffee lovers who pursue flavor fidelity. The siphon method relies on heat to drive a siphon cycle: the lower chamber is heated to about 92°C, causing water to rise and soak the coffee grounds, which then flow back for extraction after stirring. Coffee made this way has a more prominent body and requires no complex skills; common equipment on the market costs about 100-200 yuan. Electric coffee makers use electricity to automatically complete heating and steeping, making them the most convenient to operate, but high-temperature brewing may affect the delicacy of the flavor; the price range is similar to siphon (100-350 yuan).

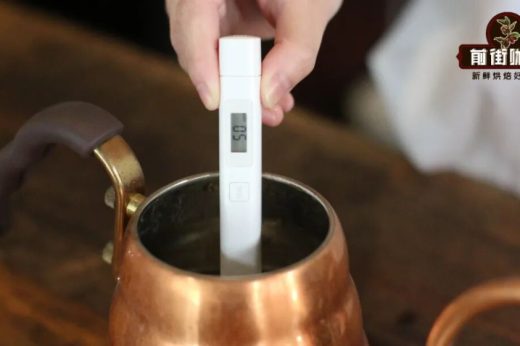
If you want to experience the true flavor of coffee beans through pour-over, Arabica is the first choice—its bright acidity and rich aroma effectively showcase the unique character of different origins. Note that the key to successful pour-over lies in precise control of water temperature, water flow, and coffee-to-water ratio: the ideal water temperature range is 86-93°C; too high easily causes excessive extraction of tannins and astringency, while too low fails to fully release the aroma; keep the water flow in an even circular path, pouring from outside inward or in reverse circulation, to ensure the coffee bed is evenly saturated; the standard coffee-to-water ratio is based on 1:15 (e.g., 18 grams of coffee to 270 milliliters of water), adjustable to personal taste.
Before brewing, prepare hot water and weigh 18 grams of coffee beans (using a 1:15 ratio as an example). Fold the filter paper and place it in the dripper, then rinse the filter paper with a small amount of hot water—this step both removes any papery off-flavors the filter may carry and helps the filter paper adhere tightly to the dripper's inner wall, preventing channeling during brewing. (Key technique 1: Pre-wet the filter paper) At the same time, warm the dripper and server with hot water to prevent the coffee liquid from losing temperature during filtration and affecting flavor expression. (Key technique 2: Preheat the equipment)

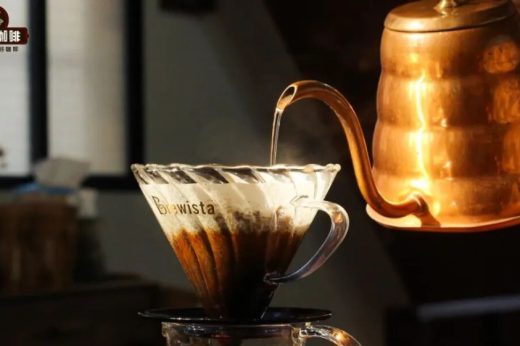
The next step is grinding: the medium-fine grind suitable for pour-over is close to the texture of coarse sugar (adjust according to the bean's roast level—slightly finer for light roasts, slightly coarser for dark roasts). After pouring the ground coffee into the dripper, tap the wall lightly to level the surface of the coffee bed, which helps the water flow evenly through during pouring. (Key technique 3: Even coffee bed) For the actual brewing, first use hot water at 86-93°C (adjusted flexibly according to the bean's roast level) to pour 30 grams of water centered on the middle, being careful to avoid the water stream directly hitting the edge of the filter paper. (Key technique 4: Keep the first pour off the filter paper) When the coffee grounds are fully saturated and coffee begins dripping into the server, pause pouring and let it bloom for 30 seconds—this process allows the coffee grounds to release internal carbon dioxide gas, making subsequent extraction more even, while you observe whether the coffee bed expands evenly. (Key technique 5: Bloom to activate flavor)

After the bloom, start from the center of the coffee bed and pour slowly in circular motions, keeping the stream continuous and steady (avoiding sudden changes in flow). The first pour can be done in 1-2 stages, gradually increasing the total water volume. While pouring, control the flow rate and coverage area to ensure all coffee grounds are evenly extracted, and observe changes in the flow rate and color of the coffee liquid. (Key technique 6: Steady water flow) When the cumulative water volume reaches 270 milliliters (calculated at a 1:15 ratio), stop, remove the dripper, give the coffee in the server a brief warm-up, and it is ready to taste.

Regarding bean selection, Arabica is the mainstream choice for pour-over due to its rich flavor layers. For example, beans from some estates have nutty and toasted-bread notes, suited to those who like a full-bodied taste; coffee from certain regions presents distinct floral and fruity or tropical fruit flavors with bright sweet acidity; other beans feature caramel and woody aromas with prominent sweetness. Different flavor profiles require corresponding brewing parameters—for light-roasted beans, use slightly higher water temperatures of 90-93°C and extend extraction time to highlight acidity and aroma; for medium-dark roasted beans, lower the water temperature to 86-89°C to avoid the bitterness of over-extraction.
Common pitfalls to note: avoid brewing directly with boiling water (which easily scalds the coffee grounds and causes sharp acidity), do not pour too much water at once and cause localized over-extraction, and pay attention to the dripper's tilt angle and pouring height (too high makes the water flow too forceful). After mastering these basic points, adjust the details through repeated practice, and you too can consistently produce a well-balanced cup of pour-over black coffee at home.